Choosing the Right Countertop Material: How To Replace Bathroom Vanity Countertop
Choosing the right countertop material for your bathroom vanity is a crucial decision that will impact the look, functionality, and longevity of your space. With a wide array of materials available, each boasting its own unique characteristics, understanding the pros and cons of each option is essential for making an informed choice.
Comparing Bathroom Countertop Materials
The choice of bathroom countertop material depends largely on your budget, desired aesthetic, and the level of maintenance you’re willing to undertake. Here’s a breakdown of popular materials, their pros and cons, and their suitability for different bathroom styles:
Natural Stone
Natural stone, such as granite and marble, offers unparalleled beauty and durability. These materials are known for their unique veining patterns and timeless elegance.
- Granite: Highly resistant to scratches, heat, and stains, granite is a durable choice for high-traffic areas. It comes in a wide range of colors and patterns, making it suitable for various bathroom styles. However, granite is a porous material and requires regular sealing to prevent staining.
- Marble: Renowned for its luxurious appeal and classic elegance, marble adds a touch of sophistication to any bathroom. However, it’s more susceptible to scratches and stains than granite and requires meticulous care. Marble is also sensitive to acidic substances, so it’s best to avoid using harsh cleaners.
Engineered Stone (Quartz)
Engineered stone, primarily quartz, is a popular choice for bathroom countertops due to its durability and low maintenance requirements. It’s a non-porous material, making it resistant to stains and bacteria.
- Quartz: Quartz countertops offer a wide range of colors and patterns, including those mimicking natural stone. They are highly resistant to scratches, heat, and stains, making them an excellent choice for busy bathrooms. However, quartz is more expensive than laminate and solid surface materials.
Laminate
Laminate countertops are an affordable and versatile option, offering a wide range of colors, patterns, and textures. They are easy to clean and maintain, making them a practical choice for budget-conscious homeowners.
- Laminate: Laminate countertops are durable and resistant to scratches and stains, but they are not as heat-resistant as other materials. They are also susceptible to water damage if not properly sealed.
Solid Surface
Solid surface countertops are made from a non-porous material that is seamless and easy to clean. They are available in a wide range of colors and can be customized to fit any bathroom design.
- Solid Surface: Solid surface countertops are known for their durability and resistance to scratches and stains. They are also non-porous, making them resistant to bacteria and mold growth. However, solid surface materials can be susceptible to heat damage.
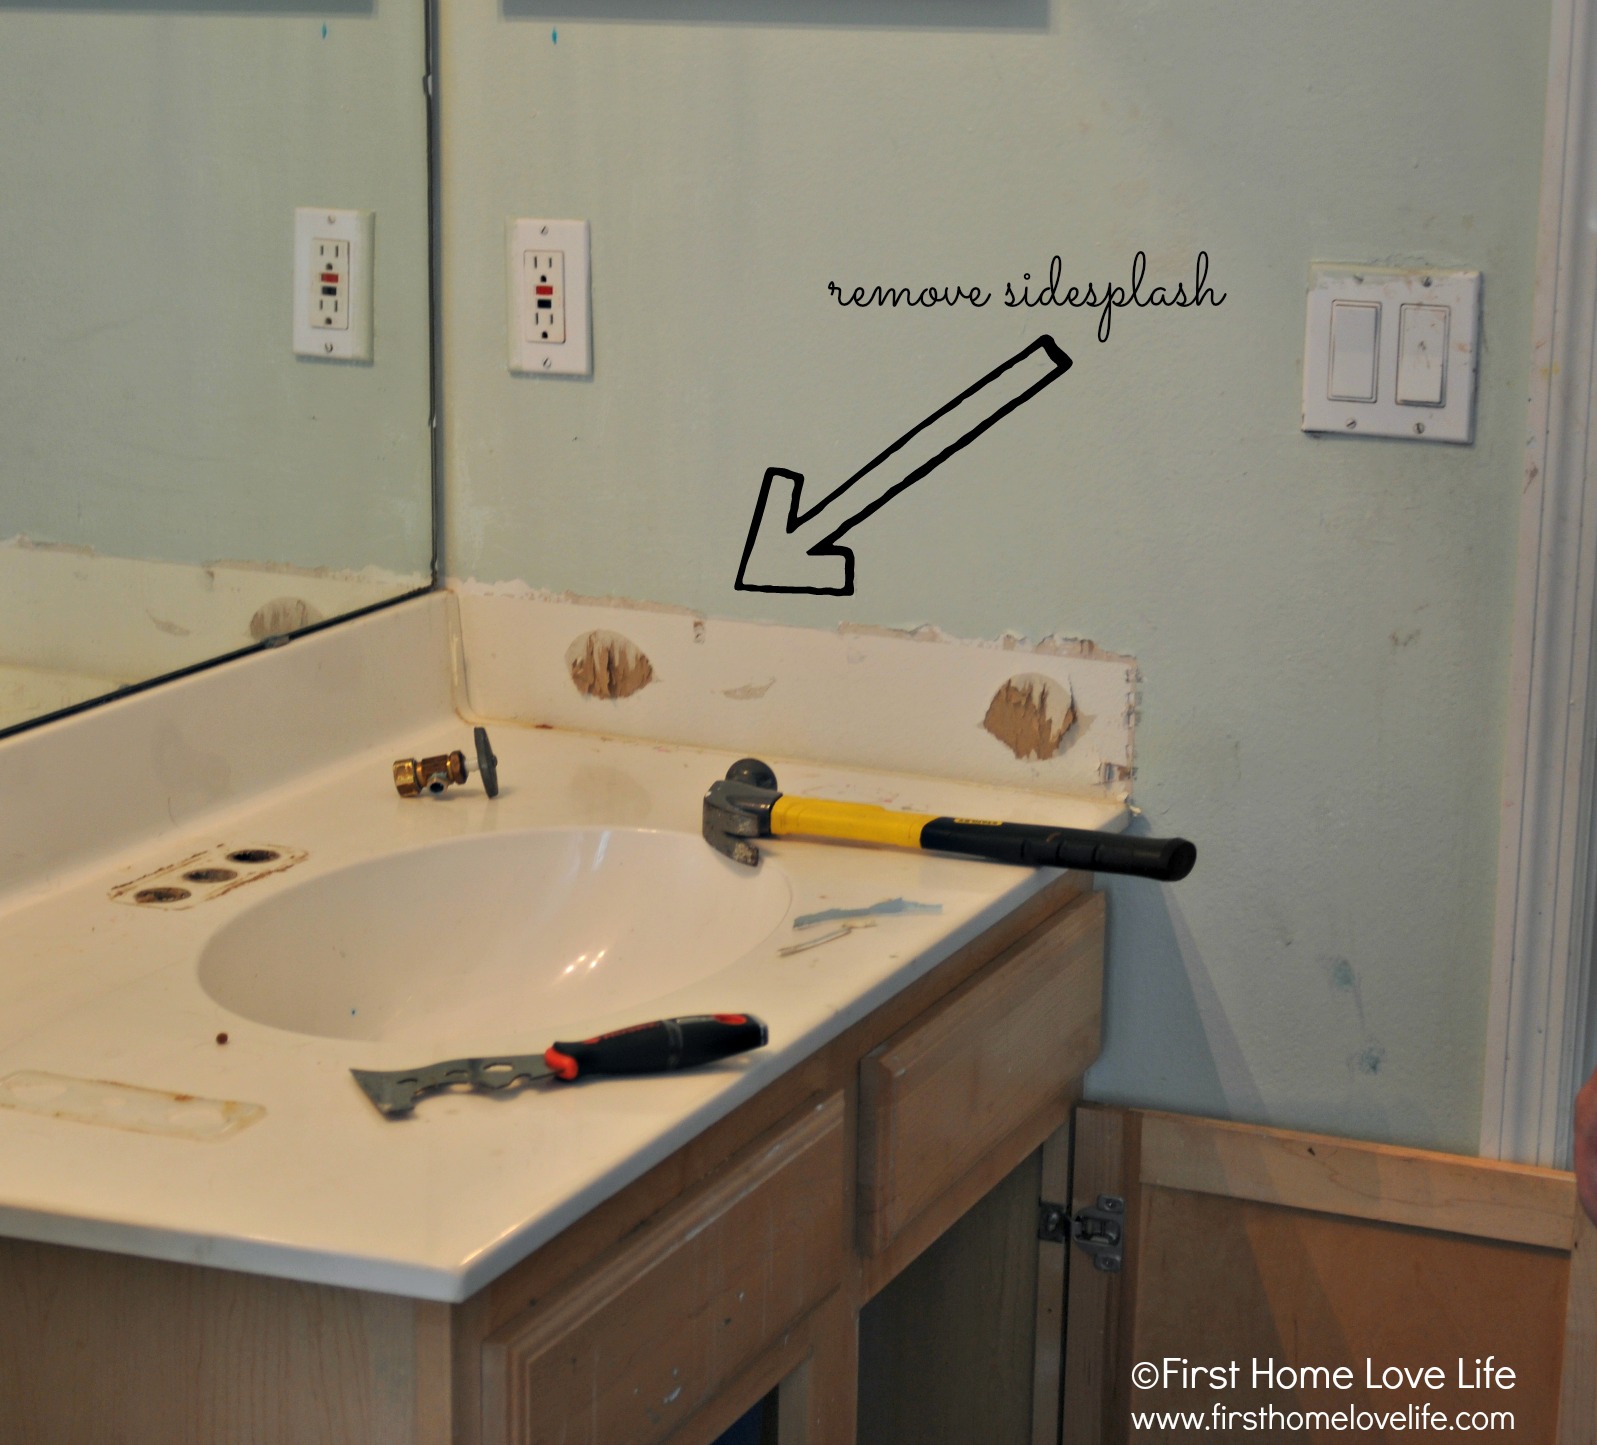
Removing the Old Countertop
:max_bytes(150000):strip_icc()/8_IMG_3767-56a4a2753df78cf772835b72.JPG "Bathroom countertop replace loveandrenovations vanity countertops renovations love saved replacing")
Removing the old countertop is a crucial step in replacing your bathroom vanity countertop. This process requires careful planning and execution to avoid damage to your vanity or yourself. This section provides a step-by-step guide on how to safely remove the existing countertop, including disconnecting the sink, removing the caulk, and detaching the countertop from the vanity.
Tools and Safety Precautions
Before you begin, gather the necessary tools and ensure you have the proper safety equipment.
- Safety Glasses: Protect your eyes from flying debris.
- Work Gloves: Protect your hands from cuts and scrapes.
- Utility Knife: Used to cut the caulk around the countertop.
- Putty Knife: Used to remove the caulk and loosen the countertop.
- Screwdriver: Used to remove screws holding the countertop in place.
- Wrench: Used to disconnect the sink from the plumbing.
- Bucket: Used to collect water from the sink and countertop.
- Shop Vac: Used to clean up debris.
It is essential to take the following safety precautions:
- Turn off the water supply: Before disconnecting the sink, turn off the water supply to prevent flooding.
- Wear appropriate safety gear: Always wear safety glasses and work gloves when handling sharp tools.
- Be careful when handling heavy objects: The countertop can be heavy. Use a helper if necessary.
- Use caution when cutting the caulk: Use a sharp utility knife and avoid cutting into the vanity.
Step-by-Step Removal Process
| Step | Description | Image | Notes |
|---|---|---|---|
| 1 | Disconnect the sink: Turn off the water supply to the sink. Use a wrench to disconnect the supply lines from the sink. Carefully remove the sink from the countertop. | [Image of a person disconnecting the sink from the countertop using a wrench.] | The sink is typically secured to the countertop with clips or screws. If your sink is glued to the countertop, you may need to use a utility knife to carefully cut through the adhesive. |
| 2 | Remove the caulk: Use a utility knife to cut the caulk around the edge of the countertop. Use a putty knife to remove the caulk from the countertop and the vanity. | [Image of a person using a utility knife to cut the caulk around the edge of the countertop.] | Be careful not to damage the vanity when removing the caulk. If the caulk is old and brittle, it may be easier to remove with a heat gun. |
| 3 | Detach the countertop: Once the caulk is removed, you can detach the countertop from the vanity. Look for any screws or clips that are holding the countertop in place. Remove these fasteners and carefully lift the countertop off the vanity. | [Image of a person lifting the countertop off the vanity.] | Use a helper to lift the countertop if it is heavy. Be careful not to damage the vanity when removing the countertop. |
Installing the New Countertop

Now that the old countertop is out of the way, it’s time to install the new one. This is where the real fun begins, and with the right tools and techniques, you can achieve a professional-looking finish.
Preparing the Vanity, How to replace bathroom vanity countertop
Before installing the countertop, it’s essential to prepare the vanity to ensure a smooth and secure installation. This involves cleaning the vanity top and ensuring that the surface is level.
- Clean the vanity top thoroughly, removing any debris or dust that could interfere with the installation.
- Use a level to check if the vanity top is level. If it’s not, you can adjust the legs or shims to achieve a level surface.
Attaching the Countertop
With the vanity prepped, it’s time to attach the new countertop. This step might vary depending on the countertop material, but generally involves using silicone sealant and screws for a secure bond.
- Apply a bead of silicone sealant along the edge of the vanity top where the countertop will sit. This helps create a watertight seal and prevents leaks.
- Carefully place the countertop onto the vanity top, ensuring it’s aligned and centered.
- Use screws to secure the countertop to the vanity. The number and location of screws will depend on the countertop material and the vanity’s design.
Sealing the Edges
Once the countertop is attached, it’s crucial to seal the edges to prevent water damage. This involves applying silicone sealant along the edges of the countertop where it meets the vanity and backsplash.
- Apply a bead of silicone sealant along the edges of the countertop where it meets the vanity and backsplash. This helps create a watertight seal and prevents leaks.
- Use a putty knife to smooth out the sealant and ensure a neat and even finish.
- Allow the sealant to cure completely before using the countertop. This typically takes 24 hours.
Installing the Sink
The final step is installing the sink. This involves cutting a hole in the countertop for the sink, attaching the sink to the countertop, and connecting the plumbing.
- Use a template provided by the sink manufacturer to mark the countertop where the sink will be installed.
- Carefully cut the hole in the countertop using a jigsaw or a special sink cutout tool.
- Apply silicone sealant to the edges of the sink cutout and gently lower the sink into place.
- Use clamps to secure the sink to the countertop while the sealant cures.
- Once the sealant is cured, connect the plumbing to the sink.

